
Tuesday, December 8, 2015

Tuesday, September 9, 2014
New (old) lighting!
Dad is selling his house, and I'm reaping the benefits! (Blatant rip-off of a Jon Lovitz quote, there...)
Seriously, since Dad didn't want to lose his mom's chandelier in the sale, it came to Brooklyn. After a couple months living in the basement, I finally hung it up - in the breakfast nook. We already had lights we liked in the hallway and dining room, which would have been more normal locations for a chandelier, and it amuses me to fancy-up the nook. Trust me, the fancy light is pretty awesome with the repurposed slightly dog chewed butcher block table.


Seriously, since Dad didn't want to lose his mom's chandelier in the sale, it came to Brooklyn. After a couple months living in the basement, I finally hung it up - in the breakfast nook. We already had lights we liked in the hallway and dining room, which would have been more normal locations for a chandelier, and it amuses me to fancy-up the nook. Trust me, the fancy light is pretty awesome with the repurposed slightly dog chewed butcher block table.
Monday, June 30, 2014
Hallway tiles begone!
Welcome pine wood floors!

The hallway and stairs were the last part of the house that had linoleum. They had the usual multiple layers, but unlike the rest of the house, the tiles were breaking all over the place. I finally couldn't take it anymore, and up it came (thanks Kaitlin and R2!). The downstairs was like the rest of the house - look at it funny, and it came up - but the tiles were glued quite firmly to the stairs, and the upstairs hallway was a layer of tile over pine paneling. Yes, paneling. Someone nailed it finish side down to the subfloor, and then tiled on top. So very odd.

Underneath it all, we found the same subfloor that's in the rest of the house. The subfloor was in great condition in the living and dining rooms, and it finished up very nicely. In the hallway, though, it was gappy, battered, and covered with mastic. Instead of struggling to finish it, we instead decided on new flooring. After a bunch of research (wow, flooring can be expensive), we went with engineered floors with a reclaimed heart pine surface. The engineered floor is plywood topped with the pine wood. It's as hardy if not more so than solid wood, can be refinished when necessary, and comes completely finished (no sanding dust!). It's a lot sturdier and I think less plastic looking than laminate. I slowly laid the floor over the past couple weeks, with a push from Mary to get it completed yesterday (thanks Mary!).
So, we went from this (incredibly old pic, can't find a more recent one):

to this:


The staircase will be ugly for a while - it's summer, I don't want to be inside sanding! - but will eventually have the ugly peach paint removed, get sanded, and then get painted. The floors still need edge molding, but that can wait until after summer as well.
Yay for no linoleum and an entry hallway that looks much less embarrassing!
The hallway and stairs were the last part of the house that had linoleum. They had the usual multiple layers, but unlike the rest of the house, the tiles were breaking all over the place. I finally couldn't take it anymore, and up it came (thanks Kaitlin and R2!). The downstairs was like the rest of the house - look at it funny, and it came up - but the tiles were glued quite firmly to the stairs, and the upstairs hallway was a layer of tile over pine paneling. Yes, paneling. Someone nailed it finish side down to the subfloor, and then tiled on top. So very odd.
Underneath it all, we found the same subfloor that's in the rest of the house. The subfloor was in great condition in the living and dining rooms, and it finished up very nicely. In the hallway, though, it was gappy, battered, and covered with mastic. Instead of struggling to finish it, we instead decided on new flooring. After a bunch of research (wow, flooring can be expensive), we went with engineered floors with a reclaimed heart pine surface. The engineered floor is plywood topped with the pine wood. It's as hardy if not more so than solid wood, can be refinished when necessary, and comes completely finished (no sanding dust!). It's a lot sturdier and I think less plastic looking than laminate. I slowly laid the floor over the past couple weeks, with a push from Mary to get it completed yesterday (thanks Mary!).
So, we went from this (incredibly old pic, can't find a more recent one):
to this:
The staircase will be ugly for a while - it's summer, I don't want to be inside sanding! - but will eventually have the ugly peach paint removed, get sanded, and then get painted. The floors still need edge molding, but that can wait until after summer as well.
Yay for no linoleum and an entry hallway that looks much less embarrassing!
Sunday, May 18, 2014
Monday, October 21, 2013
And now for something completely different
At Jaimee's request, I built an outdoor sink and counter. In the spirit of the ethos that is the DIY work in the house, it's...scrappy. The water comes from the hose faucet, although I did spring for the fancy stainless hose so you can drink from it safely. The drain leads to a watering can so I can reuse the water on the plants, with the overflow going into the backyard (only biodegradable soap allowed!).


The faucet originally came with the sink we bought for the upstairs bathroom, the tile is left over from the upstairs bathroom, the grout left over from the backsplash, and the apron left over from the fence. Someday I'll build a couple doors so we can store the extra propane tanks under the sink without looking at them, but for now - it works.
For those wanting something not entirely different, the bathroom work continues - it's just that the steps in finishing are so boring until actually completed! Still working on the ceiling, staining the shelves, etc. However, I did finish the sink, which was was more work than it sounds. It meant
I also hung a couple of towel hooks, which was also more work than it sounds - don't buy Kobalt tile bits. I killed 3 in drilling 2 holes.


The faucet originally came with the sink we bought for the upstairs bathroom, the tile is left over from the upstairs bathroom, the grout left over from the backsplash, and the apron left over from the fence. Someday I'll build a couple doors so we can store the extra propane tanks under the sink without looking at them, but for now - it works.
For those wanting something not entirely different, the bathroom work continues - it's just that the steps in finishing are so boring until actually completed! Still working on the ceiling, staining the shelves, etc. However, I did finish the sink, which was was more work than it sounds. It meant
- removing the extra caulk from the larger sink
- removing the sink to uninstall the faucet that came with it
- removing the faucet from the downstairs sink and installing it up here
- reinstalling the sink
- installing the faucet I bought for this sink on the downstairs faucet
I also hung a couple of towel hooks, which was also more work than it sounds - don't buy Kobalt tile bits. I killed 3 in drilling 2 holes.


And this is what Loki says to all of that.

Monday, September 23, 2013
I love lamp.
At least this one - because I made it, and it replaced the rather cheap looking partially broken plastic one that you had to climb up the couch arm to turn on. This one has a cord switch so you can actually easily turn it on while sitting, which I installed on an Ikea cordset, in the process discovering that the hot wire was not for some reason the black one, as it is usually... Well, Mom was visiting that day and I think she enjoyed the fireworks show I accidentally created.

The bathroom work continues, of course, but right now I'm pretty focused on finishing the ceiling, which means a lot of time putting up joint compound and waiting for it to dry. Nothing really worth photographing there until it's done, at which point it will hopefully look like...nothing special, just a flat ceiling.
In order to make me feel like the process is still moving though, I've started trying to work in some smaller wins around the house as well - like making the lamp (the pieces have been hanging around for a couple months waiting for me to get on that), fixing the door to my office so that it actually stays closed, adding a couple shelves in the pantry, doing some tidying in the basement, and fixing the screen on my Nexus tablet. Little wins can be so satisfying!

The bathroom work continues, of course, but right now I'm pretty focused on finishing the ceiling, which means a lot of time putting up joint compound and waiting for it to dry. Nothing really worth photographing there until it's done, at which point it will hopefully look like...nothing special, just a flat ceiling.
In order to make me feel like the process is still moving though, I've started trying to work in some smaller wins around the house as well - like making the lamp (the pieces have been hanging around for a couple months waiting for me to get on that), fixing the door to my office so that it actually stays closed, adding a couple shelves in the pantry, doing some tidying in the basement, and fixing the screen on my Nexus tablet. Little wins can be so satisfying!
Monday, September 9, 2013
This is a really nice shower.
You know, rainhead showers are really nice. Much nicer than I had predicted they'd be. How do I know this? Well, the bathroom is grouted and caulked! I even hung the door! It's completely usable! Yes, that is a lot of exclamation points, but seriously, it's such a relief. Also, I'm kind of proud of myself for this tricky folding door creation.


Most of the things left to do are actually pretty obvious from the pictures - door trim, clean up the sink, have the radiator installed, close the door holes, hang towel hooks and a mirror. I also have to finish the ceiling, hang the crown molding, put up cabinet shelves, and fix an outlet. But finishing the basics of the bathroom feel amazing!


Most of the things left to do are actually pretty obvious from the pictures - door trim, clean up the sink, have the radiator installed, close the door holes, hang towel hooks and a mirror. I also have to finish the ceiling, hang the crown molding, put up cabinet shelves, and fix an outlet. But finishing the basics of the bathroom feel amazing!
Tuesday, August 27, 2013
Tile done tile done tile done!
Can you tell I'm a little excited about this??? We finished all the tiling this weekend, thanks to slave labor from Mary, Autumn, and Jaimee. I need to grout it, caulk it, and seal it, but if all goes to plan we can shower in there this weekend!

I have no idea why the upper picture looks so blue - the reality is somewhere in between these two colors. What can I say, it was cloudy this morning. You can also see the cabinet on the left (it has an outlet built in, and will hold the hair dryer and electric toothbrush), and the doorframe. The doorframe was SO MUCH FUN to put in - at Dad's suggestion, I used this project to justify a power nailer. I got a cordless Ryobi 18 gauge, and it's my new favorite tool. 5 minutes to put up the frame (not counting cutting and chiseling), and laughter and enjoyment the whole time. That thing is awesome.


I have no idea why the upper picture looks so blue - the reality is somewhere in between these two colors. What can I say, it was cloudy this morning. You can also see the cabinet on the left (it has an outlet built in, and will hold the hair dryer and electric toothbrush), and the doorframe. The doorframe was SO MUCH FUN to put in - at Dad's suggestion, I used this project to justify a power nailer. I got a cordless Ryobi 18 gauge, and it's my new favorite tool. 5 minutes to put up the frame (not counting cutting and chiseling), and laughter and enjoyment the whole time. That thing is awesome.

There are still plenty of things left to do after grouting etc, but this feels like such a huge step towards completion. In addition to being really close to a truly fully working bathroom, all the boxes of tile and bags of thinset are gone from the living room and hallway, and a lot of tools are actually put away and not piled in my office. The house is much closer to just being a house and not a construction staging zone!
Thursday, August 15, 2013
It works!
Well, the last time the plumbers came to visit we had to go from this:
 to this.

Which was frustrating and exhausting. But after a full weekend of work plus some late nights, we've managed to end up here:


I actually peed in the upstairs bathroom for the first time since early June! (Ok, perhaps too much info. Whatever.) The bathroom walls are fully closed up. I built and installed a cabinet for the wall next to the toilet, so the upstairs bathroom will actually have storage! The tiling is completed on the toilet wall, halfway done on the opposite wall, and 2/3 done on the sink wall.
And speaking of sinks - if you look closely, you might see a lot of white on the wall around the sink. That's caulk. This is actually the second sink we installed - the first one was just too big in the space. We found this one at Build It Green in Gowanus for a whopping $20 which was pretty awesome - except that the new faucet didn't fit in it. So in addition to cleaning up all the caulking on the wall, I have to put the new faucet on the downstairs sink and bring the downstairs sink faucet up here to install (after I make sure the downstairs faucet is also not too big). I think that can wait for the tiling to be complete and the door hung, though.
Still left to do - complete the wall tiling and grouting. Have the plumbers back to fix the radiator pipes they messed up. Build a small cabinet for the hair dryer outlet. Finish the floor tiling and grouting, then caulk and seal. Finish the ceiling drywall taping and paint the ceiling. Hang the door frame and door. Build shelves and a door for the big cabinet. Explain to one of the GFI outlets that it WILL work, thank you. Hang the stuff (you know, towel holders, tp holder, mirror). Just keep swimming.


Which was frustrating and exhausting. But after a full weekend of work plus some late nights, we've managed to end up here:


I actually peed in the upstairs bathroom for the first time since early June! (Ok, perhaps too much info. Whatever.) The bathroom walls are fully closed up. I built and installed a cabinet for the wall next to the toilet, so the upstairs bathroom will actually have storage! The tiling is completed on the toilet wall, halfway done on the opposite wall, and 2/3 done on the sink wall.
And speaking of sinks - if you look closely, you might see a lot of white on the wall around the sink. That's caulk. This is actually the second sink we installed - the first one was just too big in the space. We found this one at Build It Green in Gowanus for a whopping $20 which was pretty awesome - except that the new faucet didn't fit in it. So in addition to cleaning up all the caulking on the wall, I have to put the new faucet on the downstairs sink and bring the downstairs sink faucet up here to install (after I make sure the downstairs faucet is also not too big). I think that can wait for the tiling to be complete and the door hung, though.
Still left to do - complete the wall tiling and grouting. Have the plumbers back to fix the radiator pipes they messed up. Build a small cabinet for the hair dryer outlet. Finish the floor tiling and grouting, then caulk and seal. Finish the ceiling drywall taping and paint the ceiling. Hang the door frame and door. Build shelves and a door for the big cabinet. Explain to one of the GFI outlets that it WILL work, thank you. Hang the stuff (you know, towel holders, tp holder, mirror). Just keep swimming.
Tuesday, July 30, 2013
2 steps forward, 1 step back
Remember I said we'd come back from vacation to a working second toilet and sink? Not so much. This time it wasn't me biting off more than I can chew - when the plumber came to install the toilet bowl onto the carrier (in wall toilet), he discovered that they had set the carrier too low. 3" too low.
After some discussion with the head guy, this means I have to take off the tile around the toilet and cut off the cement board there so they can move the carrier up. Then I get to reinstall the cement board and tiles so they can then come back and install the bowl.
Well, at least I didn't hire someone to do the tiling - and at least I hadn't finished it yet...
After some discussion with the head guy, this means I have to take off the tile around the toilet and cut off the cement board there so they can move the carrier up. Then I get to reinstall the cement board and tiles so they can then come back and install the bowl.
Well, at least I didn't hire someone to do the tiling - and at least I hadn't finished it yet...
Friday, July 12, 2013
Tile!
We made it! Well, I have to grout tonight, but unless the grout gods hate me way more than usual - we made it! There's enough tile done to install the fixtures - which means we'll return from vacation to a second flushing toilet and sink. That is so very exciting. Nothing like creeping down a flight of stairs at 4 am because you really have to pee and you don't want to wake the dog up and get him all excited.

There is absolutely no way I would have finished this much of the tile (the wall to the left is also tiled up 2 levels) without the cheerful sweaty labor of Jaimee and Sabrina, and the clean up crew of Autumn. Thanks guys. My sanity appreciates.
And yes, I have tiled rather oddly. Most people do either the floor or the walls first, not parts of each. If we're going to go down that path, I suppose most people hang the rest of the ceiling and walls before tiling at all. But you know what? Second flushing toilet. That's all I have to say about that. Sometimes the little things in life are important enough to make you figure out how work over and around a sink.
I will say the tiling was so much easier than the downstairs bathroom, mostly because this time I know what I'm doing. I also brought the tile saw upstairs, which made a huge difference for speed - and leg exhaustion. Grouting tonight and then the beach tomorrow and recovery from a week of late night tiling!

There is absolutely no way I would have finished this much of the tile (the wall to the left is also tiled up 2 levels) without the cheerful sweaty labor of Jaimee and Sabrina, and the clean up crew of Autumn. Thanks guys. My sanity appreciates.
And yes, I have tiled rather oddly. Most people do either the floor or the walls first, not parts of each. If we're going to go down that path, I suppose most people hang the rest of the ceiling and walls before tiling at all. But you know what? Second flushing toilet. That's all I have to say about that. Sometimes the little things in life are important enough to make you figure out how work over and around a sink.
I will say the tiling was so much easier than the downstairs bathroom, mostly because this time I know what I'm doing. I also brought the tile saw upstairs, which made a huge difference for speed - and leg exhaustion. Grouting tonight and then the beach tomorrow and recovery from a week of late night tiling!
Monday, July 8, 2013
Now we're rolling
Finally got enough of the basics done to start putting up walls and floor! The walls are about 2/3 up, but enough to get tiled and have the fixtures installed. The floor is ready for tile. I need to paint on the waterproofing membrane, and then tile away! I'd love to finish enough of the tile to have the fixtures installed before vacation, but that might be a little aggressive even for me. If I miss though, at least I'll be in a great spot for when we get back.
From here:

To here (actually a little further than depicted, that wall is covered and the seams have been taped):

From here:

To here (actually a little further than depicted, that wall is covered and the seams have been taped):

Thursday, June 27, 2013
The thing about small bathrooms
is that there isn't much room to work. And roughed in plumbing means pipes just sticking out of things... Combine those elements with heat and tiredness, and you smack your head on pipes a lot. Here's to Harry Potter.


Wednesday, June 26, 2013
Man, I hate the tedious behind the scenes work.
I've been working on the bathroom every night after work. The weekends are pretty booked, so that's all the time I have. It's been progressing, but right now the progress is frustratingly small to the eye.
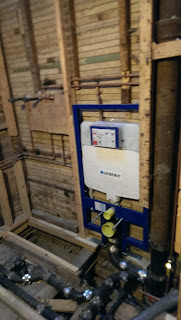
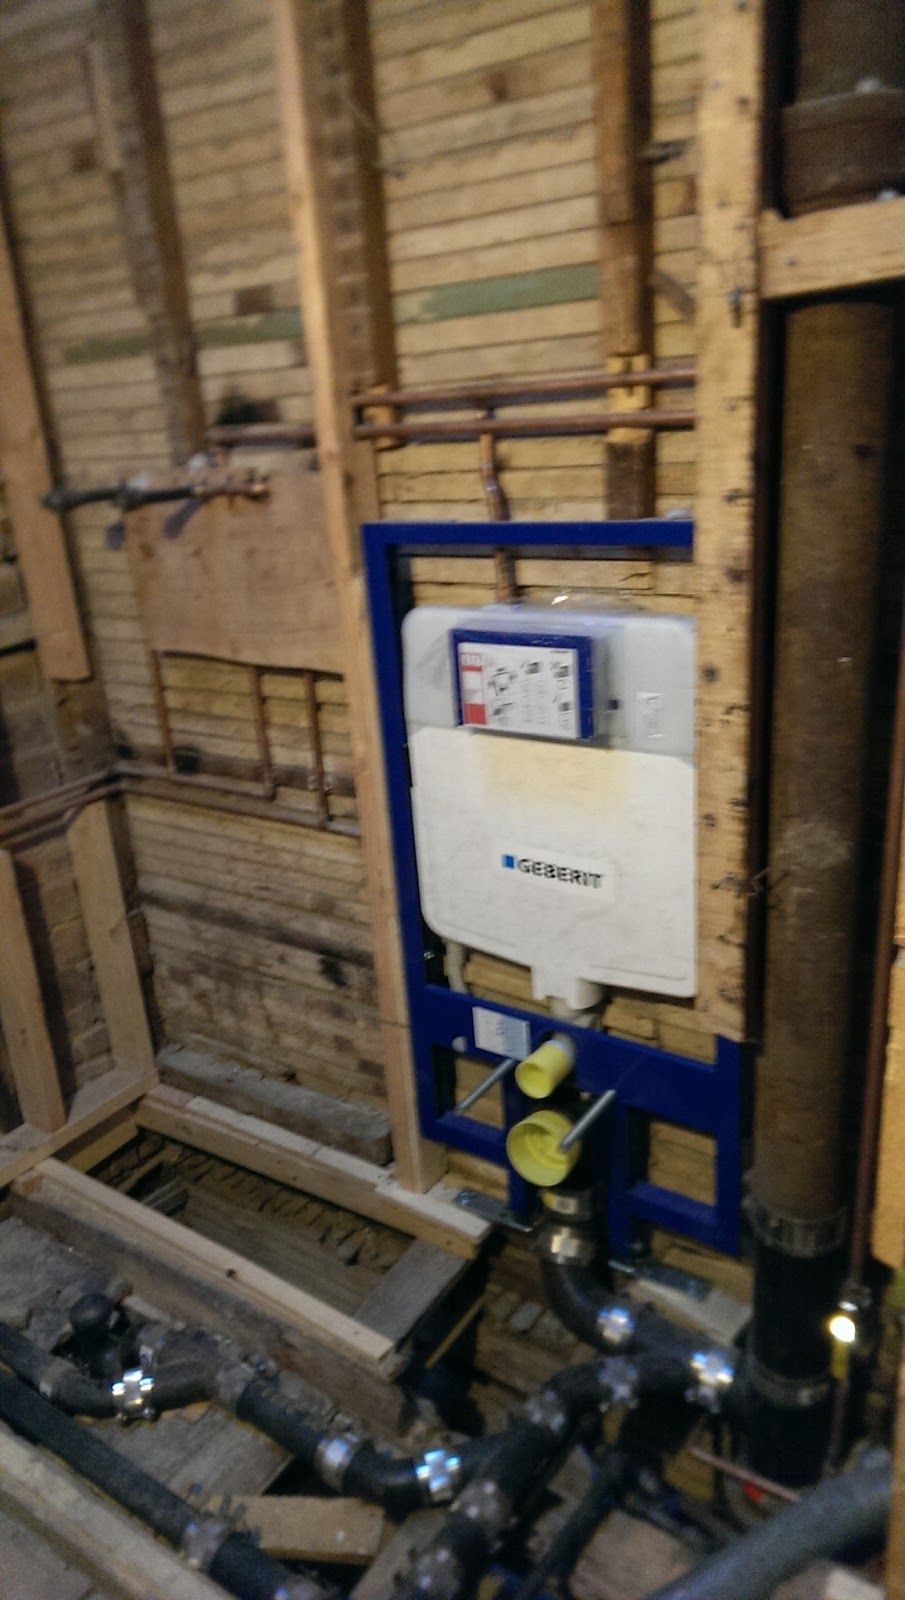
The new plumbing is roughed in, and I've nearly finished the electric - installed a new recessed light and a new light/fan combo - but the majority of the time has been in leveling out the walls and figuring out how to deal with covering some of the plumbing. It's so boring - all this cement board in the hall, and I just want it up on the wall! But if I don't get the walls straight now, you'll really be able to tell.
I've framed one wall twice, as the first time I built it too far away from the wall (plumbers then told me to redo it and notch the studs for the plumbing). I'd be done with the electric already, but for some reason one of the lights doesn't work now that I added another line. The subfloor is laid, but I have to get everything up to the level of the shower pan. Essentially - the "Sarah is not a pro" status has really slowed me down! However - I'm gettin' it done. If slower than I hoped!


The new plumbing is roughed in, and I've nearly finished the electric - installed a new recessed light and a new light/fan combo - but the majority of the time has been in leveling out the walls and figuring out how to deal with covering some of the plumbing. It's so boring - all this cement board in the hall, and I just want it up on the wall! But if I don't get the walls straight now, you'll really be able to tell.
I've framed one wall twice, as the first time I built it too far away from the wall (plumbers then told me to redo it and notch the studs for the plumbing). I'd be done with the electric already, but for some reason one of the lights doesn't work now that I added another line. The subfloor is laid, but I have to get everything up to the level of the shower pan. Essentially - the "Sarah is not a pro" status has really slowed me down! However - I'm gettin' it done. If slower than I hoped!


Thursday, June 6, 2013
Crazy busy - but not much to show
I've spent the past month keeping up with the garden and running about like one of those animals at the zoo that hold still for a moment and then take off with a burst of speed. Nope, can't remember the name.
Anyway, the backyard looks pretty much the same, just a bit more grown in. It's actually taken quite a bit of work and lots of added plants, but the main area is still rather a dirt pit.
However, there's been a bit of a focus change - the upstairs bathroom decided to begin leaking into the downstairs bathroom, so the renovation timeline for that got moved up. I had it demo'ed on Monday, and just ordered all the fixtures. Hopefully the reconstruction will begin next week, plumber willing...
We had originally thought that we would turn the bath/toilet 180 degrees and make the upstairs little nook room into the bathroom (it has a window!) and make the current bathroom the closet. The first estimate I got to move the plumbing was ridiculously expensive though, so we nixed that option. I'm waiting for the second plumber, but in gutting the current bathroom we gained a ton of height and a wide skylight (why do people drop ceilings???) so it's already looking more spacious. Stay tuned for more updates as the project actually progresses!
Anyway, the backyard looks pretty much the same, just a bit more grown in. It's actually taken quite a bit of work and lots of added plants, but the main area is still rather a dirt pit.
However, there's been a bit of a focus change - the upstairs bathroom decided to begin leaking into the downstairs bathroom, so the renovation timeline for that got moved up. I had it demo'ed on Monday, and just ordered all the fixtures. Hopefully the reconstruction will begin next week, plumber willing...
We had originally thought that we would turn the bath/toilet 180 degrees and make the upstairs little nook room into the bathroom (it has a window!) and make the current bathroom the closet. The first estimate I got to move the plumbing was ridiculously expensive though, so we nixed that option. I'm waiting for the second plumber, but in gutting the current bathroom we gained a ton of height and a wide skylight (why do people drop ceilings???) so it's already looking more spacious. Stay tuned for more updates as the project actually progresses!
Monday, April 22, 2013
See, it looks a little different
We worked on and off in the yard this week, and then Hobs came over for a marathon gardening session on Sunday. We:
After all that, we're in a really good place for the ground cover to take off (hopefully!) and make the back stop looking like a dirt pit!

- buried the drip hose (thanks Mary!)
- planted my birthday apple tree (thanks Dad!)
- added a ton more topsoil as things settled
- moved the big hydrangea
- moved the lavender
- moved something else that I don't know - perhaps a lily
- leveled out the yard
- set a path using the bluestone we found under the concrete
- planted jasmine, thyme and clover seeds.
After all that, we're in a really good place for the ground cover to take off (hopefully!) and make the back stop looking like a dirt pit!

Monday, April 15, 2013
Springing it in with a vengeance
The backyard had a concrete path that led to nowhere - it was basically a sidewalk down the middle of the yard. Since the path to nowhere bothered us, we decided to rip it out. We rented a jackhammer, bought some topsoil to replace the concrete, and bribed friends with the promise of steaks, beer, and the use of a sledgehammer if they came to help.
Jackhammering was too much for me (I'm too short for leverage, and don't have the weight to overcome my height), but luckily our taller friends ruled it while Jaimee wielded the sledge to break up the pieces:
.JPG)
Once the pieces were broken up, everyone pitched in to load them into bags and carry them out front.

I managed to avoid this heavy labor by spending my time building a "litter box" for Loki, as well as a compost box for the results of the dog-litter-box. The team then filled the trench with topsoil (we need to get more), and covered it with weed fabric so we don't accidentally create a feral cat litterbox, and we re-routed the drip hoses for full yard coverage. At the end of only a couple hours, we were done!
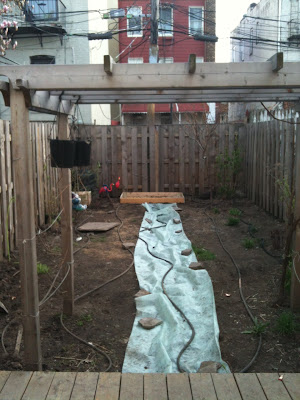
I know, it kind of looks exactly the same, since the weed cover is running where the concrete was. But the ground cover seeds are growing well, and I've ordered some supplementary plants, so hopefully planting will take place soon and change the look! We also discovered a lot of slate (and a mini-boulder) buried under the concrete - we saved it, and will figure out something to use it for. Suggestions welcomed!
Jackhammering was too much for me (I'm too short for leverage, and don't have the weight to overcome my height), but luckily our taller friends ruled it while Jaimee wielded the sledge to break up the pieces:
.JPG)
Once the pieces were broken up, everyone pitched in to load them into bags and carry them out front.

I managed to avoid this heavy labor by spending my time building a "litter box" for Loki, as well as a compost box for the results of the dog-litter-box. The team then filled the trench with topsoil (we need to get more), and covered it with weed fabric so we don't accidentally create a feral cat litterbox, and we re-routed the drip hoses for full yard coverage. At the end of only a couple hours, we were done!

I know, it kind of looks exactly the same, since the weed cover is running where the concrete was. But the ground cover seeds are growing well, and I've ordered some supplementary plants, so hopefully planting will take place soon and change the look! We also discovered a lot of slate (and a mini-boulder) buried under the concrete - we saved it, and will figure out something to use it for. Suggestions welcomed!
Monday, April 1, 2013
Maintenance March ends with a swear
...Maintenance is boring. And sometimes frustrating.
To end up the month (there are still lots of tasks to do, but they'll just have to be worked in), Jaimee got a new garbage can, and labeled our garbage and recycling with our address. I took my phone apart to replace the cracked screen, and managed to break the replacement screen while putting it back together. Sigh. Waiting for the replacement for the replacement (good thing Jaimee had a spare phone so I'm not totally out of touch).
I'd like something a little more exciting - so we're on to Spring it on April. I started some groundcover seeds to replace the grass and the sedum that didn't handle Loki well. In a couple weeks we're going to tear out the concrete path that's still back there and get the groundcover well started - hopefully!
To end up the month (there are still lots of tasks to do, but they'll just have to be worked in), Jaimee got a new garbage can, and labeled our garbage and recycling with our address. I took my phone apart to replace the cracked screen, and managed to break the replacement screen while putting it back together. Sigh. Waiting for the replacement for the replacement (good thing Jaimee had a spare phone so I'm not totally out of touch).
I'd like something a little more exciting - so we're on to Spring it on April. I started some groundcover seeds to replace the grass and the sedum that didn't handle Loki well. In a couple weeks we're going to tear out the concrete path that's still back there and get the groundcover well started - hopefully!
Friday, March 22, 2013
March theme
Apparently my unofficial theme is to be late in announcing each monthly theme, but hey. Onwards.
Settle in February went well. The murphy bed got fully attached to the wall, the legs and headboard were painted, and it got its mattress. We hung shelves for Jaimee's media center, and moved my bookshelf into my office. More pictures and random hooks got hung, we dropped stuff off at the thrift store, and basically just found homes for piles of things. Most importantly, we hung the door that will separate the guestcave from my office. The pictures and saga on that (why must we pick the world's heaviest door?) will follow in a later post.
But we were talking about March. Sometimes it actually feels like spring around here, and between that (gotta do prep work!) and the messes of the past couple months, this month has become Maintenance March. In addition to continuing the work on the murphy bed and the door, so far I've:
Settle in February went well. The murphy bed got fully attached to the wall, the legs and headboard were painted, and it got its mattress. We hung shelves for Jaimee's media center, and moved my bookshelf into my office. More pictures and random hooks got hung, we dropped stuff off at the thrift store, and basically just found homes for piles of things. Most importantly, we hung the door that will separate the guestcave from my office. The pictures and saga on that (why must we pick the world's heaviest door?) will follow in a later post.
But we were talking about March. Sometimes it actually feels like spring around here, and between that (gotta do prep work!) and the messes of the past couple months, this month has become Maintenance March. In addition to continuing the work on the murphy bed and the door, so far I've:
- spent a couple hours repairing the backyard fence
- ordered the seeds (after research and consultation!) for the lawn replacement
- patched and painted the multitude of holes created in the walls during the frequent hunt for studs in the past couple projects. In the process, I discovered that rubbing alcohol removes latex paint from clothing. Thank you interwebs!
- taken care of 3 old cans of paint (related to the above)
- put window bars up in the basement window over the deck
- and hung a new backyard solar motion detector light (creepy backyard intruders of the block begone!)
Next up - fixing the wobble on the downstairs toilet and patching and sealing the spot in the basement that the cat keeps staring at. The excitement never ends over here!
Monday, February 25, 2013
And it's up!
As the settling in continues - the murphybed is up! It was not without its drama, but with only two minor injuries caused (sorry about that bump, Max ;)), it counts as a win!
Last week Dar helped me construct the majority of the bed, following the plans that came with the hardware from Rockler. Over the week, I stained it and put on the first coat of poly. I completely forgot to take in progress pictures - so here it is right before the attaching:

And here it is after it was attached to the wall! Well, sort of attached. I apparently have amazing studless walls - in the entire span of the bed, I could only find two studs. The plans recommend attaching at four points, so I'm going to attach a board to the two studs I could find, and then attach the bed to that board as well.

It's tilted into the case at the moment - once we put the mattress in I can attach the stops that will prevent it from going back so far. I need to still paint the legs, and put on another coat of stain. But - as soon as we put the mattress in it will be usable - so big step forward for settling in!
Subscribe to:
Posts (Atom)